# Why?
In Lando + Contenta CMS + Nuxt Pt. 1 we configured the infrastructure for local development of a headless Drupal app with a Nuxt frontend.
In this article we will wire up the communication between the myapi Contenta
CMS backend and the mynuxt Nuxt frontend apps.
# Configure Contenta CMS
We'll need to configure Contenta to listen for API requests. The three main parts required are a consumer, a user, and a role.
Configure an API role vue_role
Set up a role called vue_role. You do this the same way you would set up any
Drupal role. Visit: /admin/people/roles and click the + ADD ROLE button.
Fill out the form for a new role and give it the name vue_role.
Configure an API user vue_user
The same goes for the user. Add just like any other Drupal user. Visit:
/admin/people and click the + ADD USER button. When adding the user give it
the username vue_user and check off the rule of vue_role.
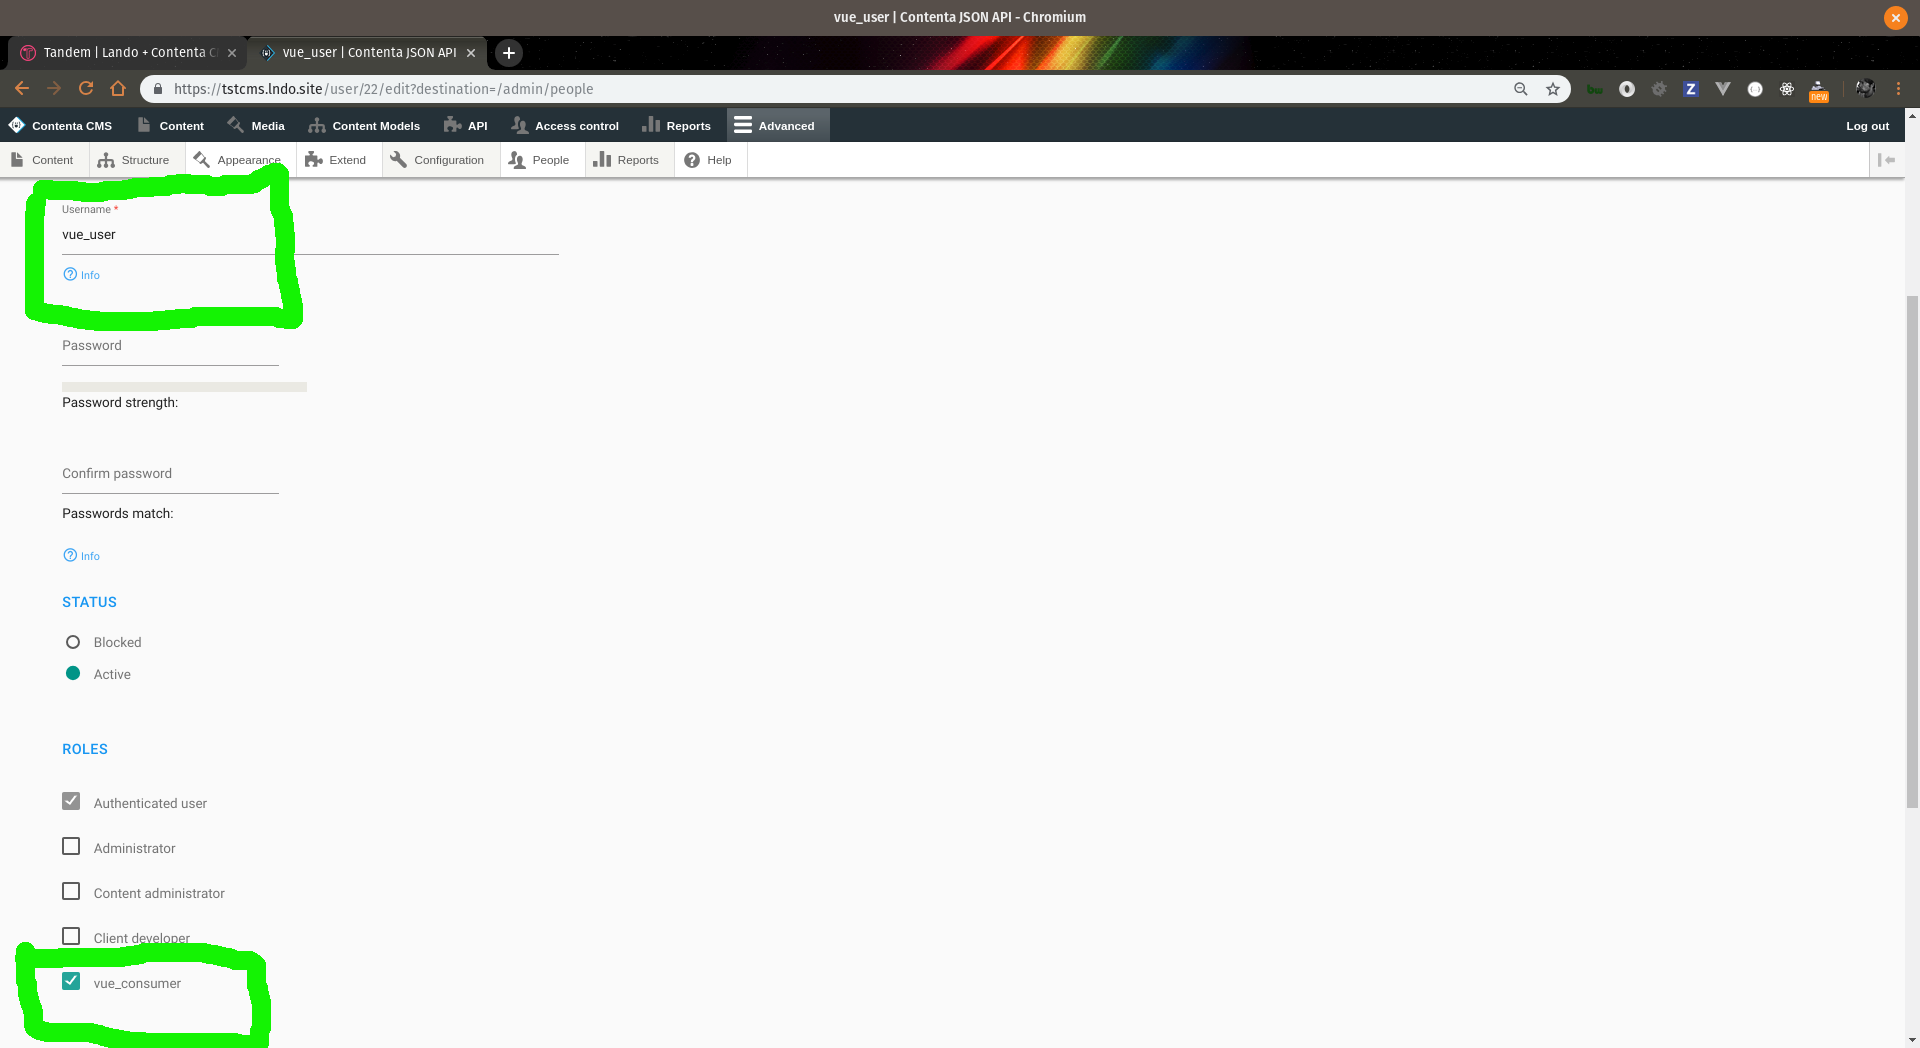
Screeenshot of add user configuration page
Save the form.
Configure a consumer vue_consumer
Let's set up a consumer called vue_consumer. Visit /admin/config/services/consumer
and click the ADD CONSUMER button:
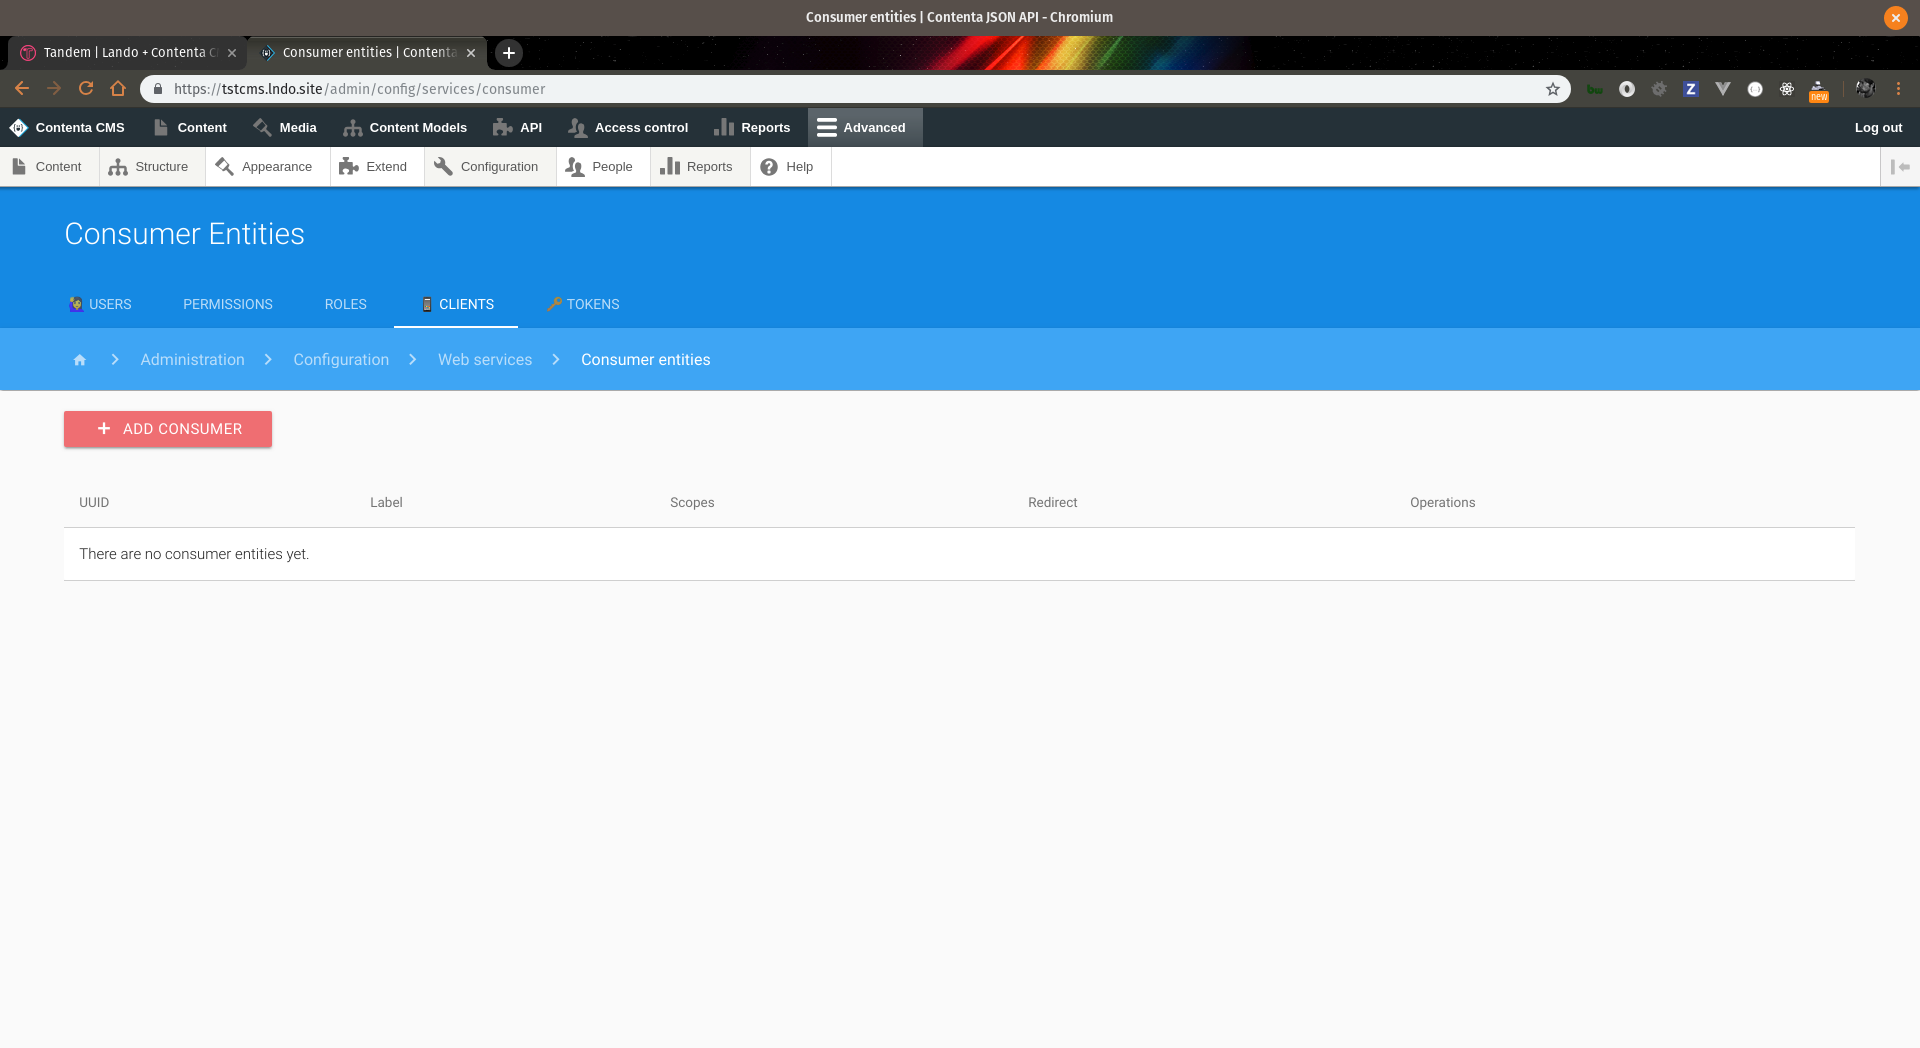
Screeenshot of add consumer configuration page
Fill out the add consumer form and be sure to name the consumer vue_consumer,
give the user vue_user, and scope of vue_role.
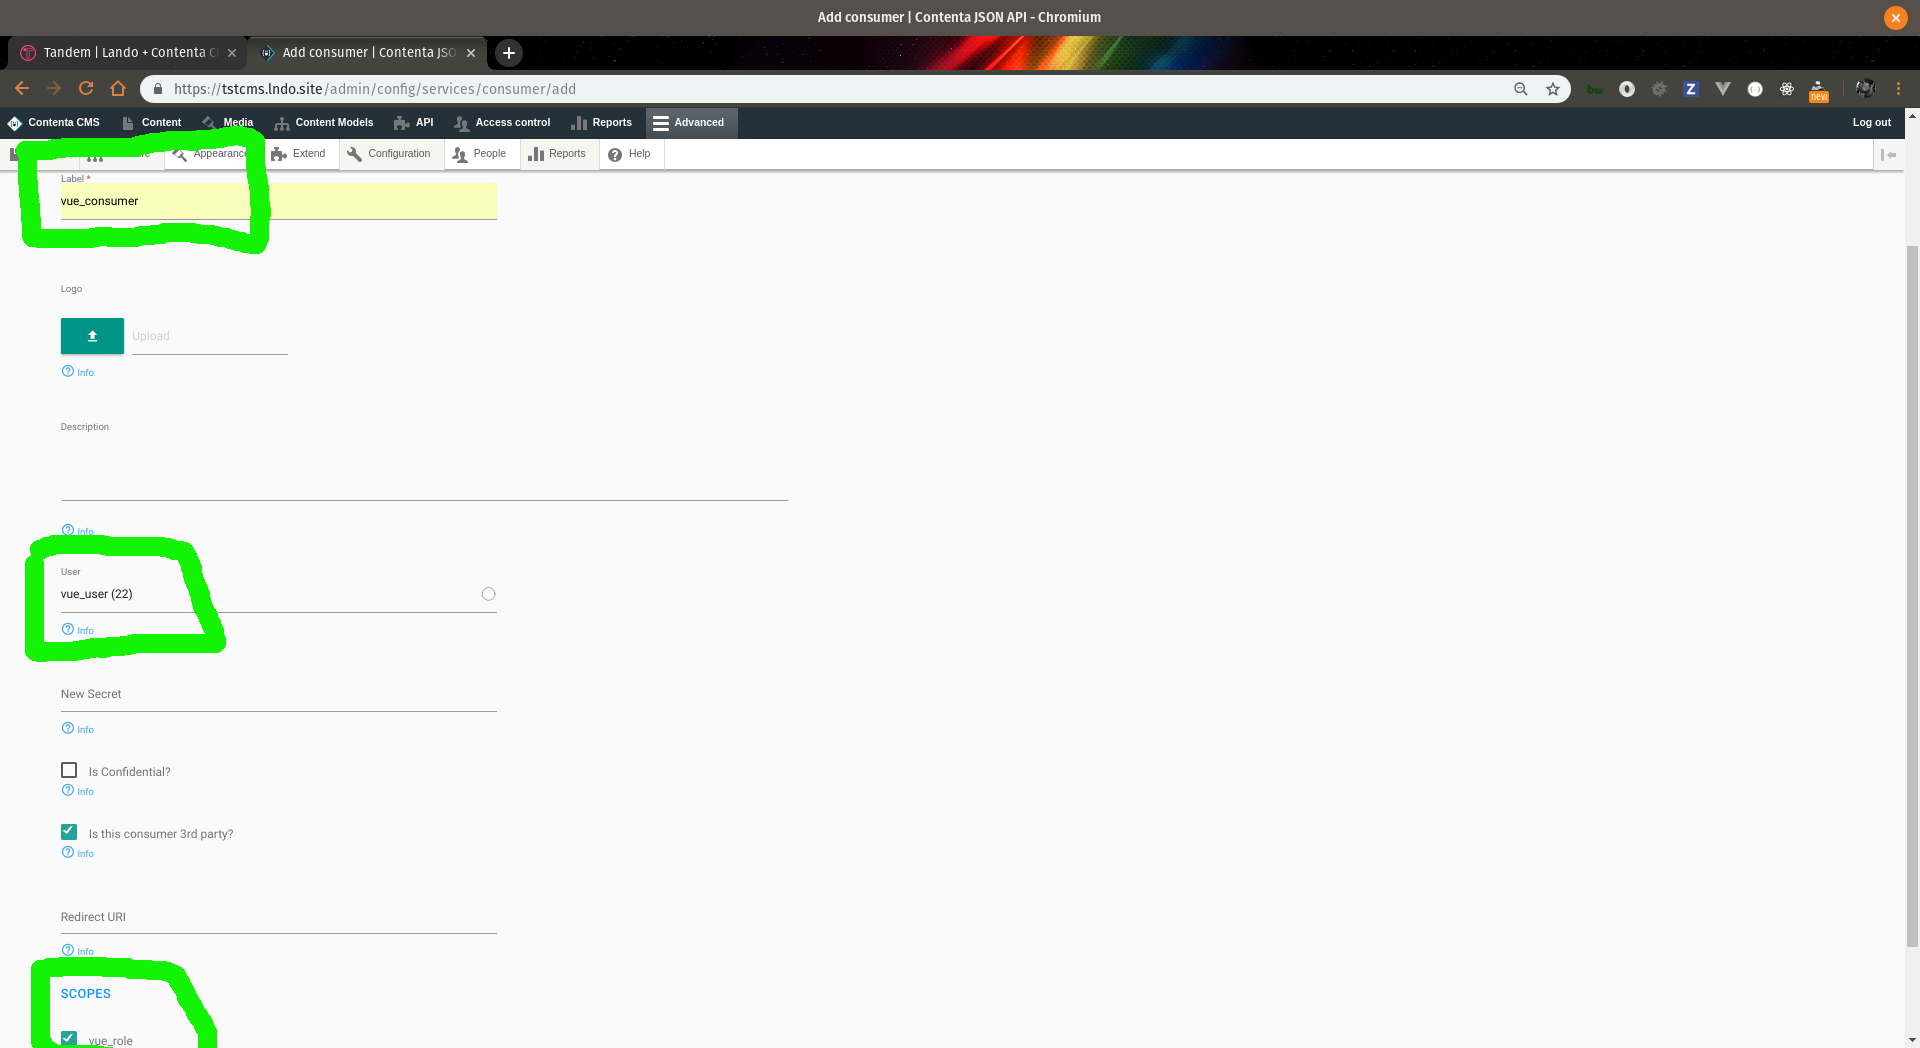
Screeenshot of add consumer add form
Save the form.
Great! Now we have the configuration in place for myapi. Let's configure our
mynuxt app! 🚀
# Configure Nuxt
To fetch data from the myapi app we will use the javascript library
axios and specifically we'll use the axios library
made for Nuxt: @nuxt/axios. If you are a PHP developer you can loosely think
about axios as the Guzzle of the javascript world. In Part 1
of this article when we installed the mynuxt app we pulled in the axios
library.
Configure ENV vars .env
We'll need to tell the mynuxt app about some environment variables to be able
to make requests to the myapi backend. In your mynuxt app create a file
named .env and add the following lines to it:
APP_ENV=lando
API_URL=http://myapi.lndo.site
CONSUMER_ID={{ GET THE CONSUMER ID from Drupal //admin/config/services/consumer }}
After adding this file you'll need to lando rebuild the mynuxt app in order
to load in the environment variables to the app containers.
Configure axios nuxt.config.js
The set up requires telling mynuxt about the axios baseURL and optionally
setting up debugging. Open the file nuxt.config.js in your code editor.
In the modules sectiton of the file, you will see that axios is already added
to our app. Underneath the modules array add and axios block:
  /*
  ** Nuxt.js modules
  */
  modules: [
    // Doc: https://axios.nuxtjs.org/usage
    '@nuxtjs/axios',
    // Doc: https://bootstrap-vue.js.org/docs/
    'bootstrap-vue/nuxt'
  ],
  /*
  ** Axios module configuration
  */
  axios: {
    // See https://github.com/nuxt-community/axios-module#options
    debug: process.env.APP_ENV !== "production"
  },
To see all the available options you can read the URL in the comment. For our
purposes, we'll turn on debugging with the caveat that our APP_ENV is not production.
Configure baseURL
Also in the nuxt.config.js file, we will add in env code block to configure
the baseURL telling axios where to make the API calls to Contenta. At the
bottom of the file after the build section add the following lines:
  env: {
    baseURL: process.env.API_URL || MYPRODUCTION.url",
    CONSUMER_ID: process.env.CONSUMER_ID
  }
After making changes to either the .env or nuxt.config.js files you'll need
to rebuild the Lando app lando rebuild -y in order to let the mynuxt app
load in those changes.
That sets up our axios config so now we can make requests from our mynuxt app
back to Contenta myapi! 🔥
# Make an API Call
Now the exciting part!
Let's make a page route called posts with an index.vue file to query back to
Contenta for a post. I've added a content type to Contenta with machine name
post and will query the endpoint /api/node/post/{uuid} for the json data. In
Nuxt there is a pages directory and everything you put in the pages directory
Nuxt will automatically create Vue routes for us. In this case we will make a
posts directory inside the pages directory:
mkdir pages/posts
So you should end up with a directory structure like this:
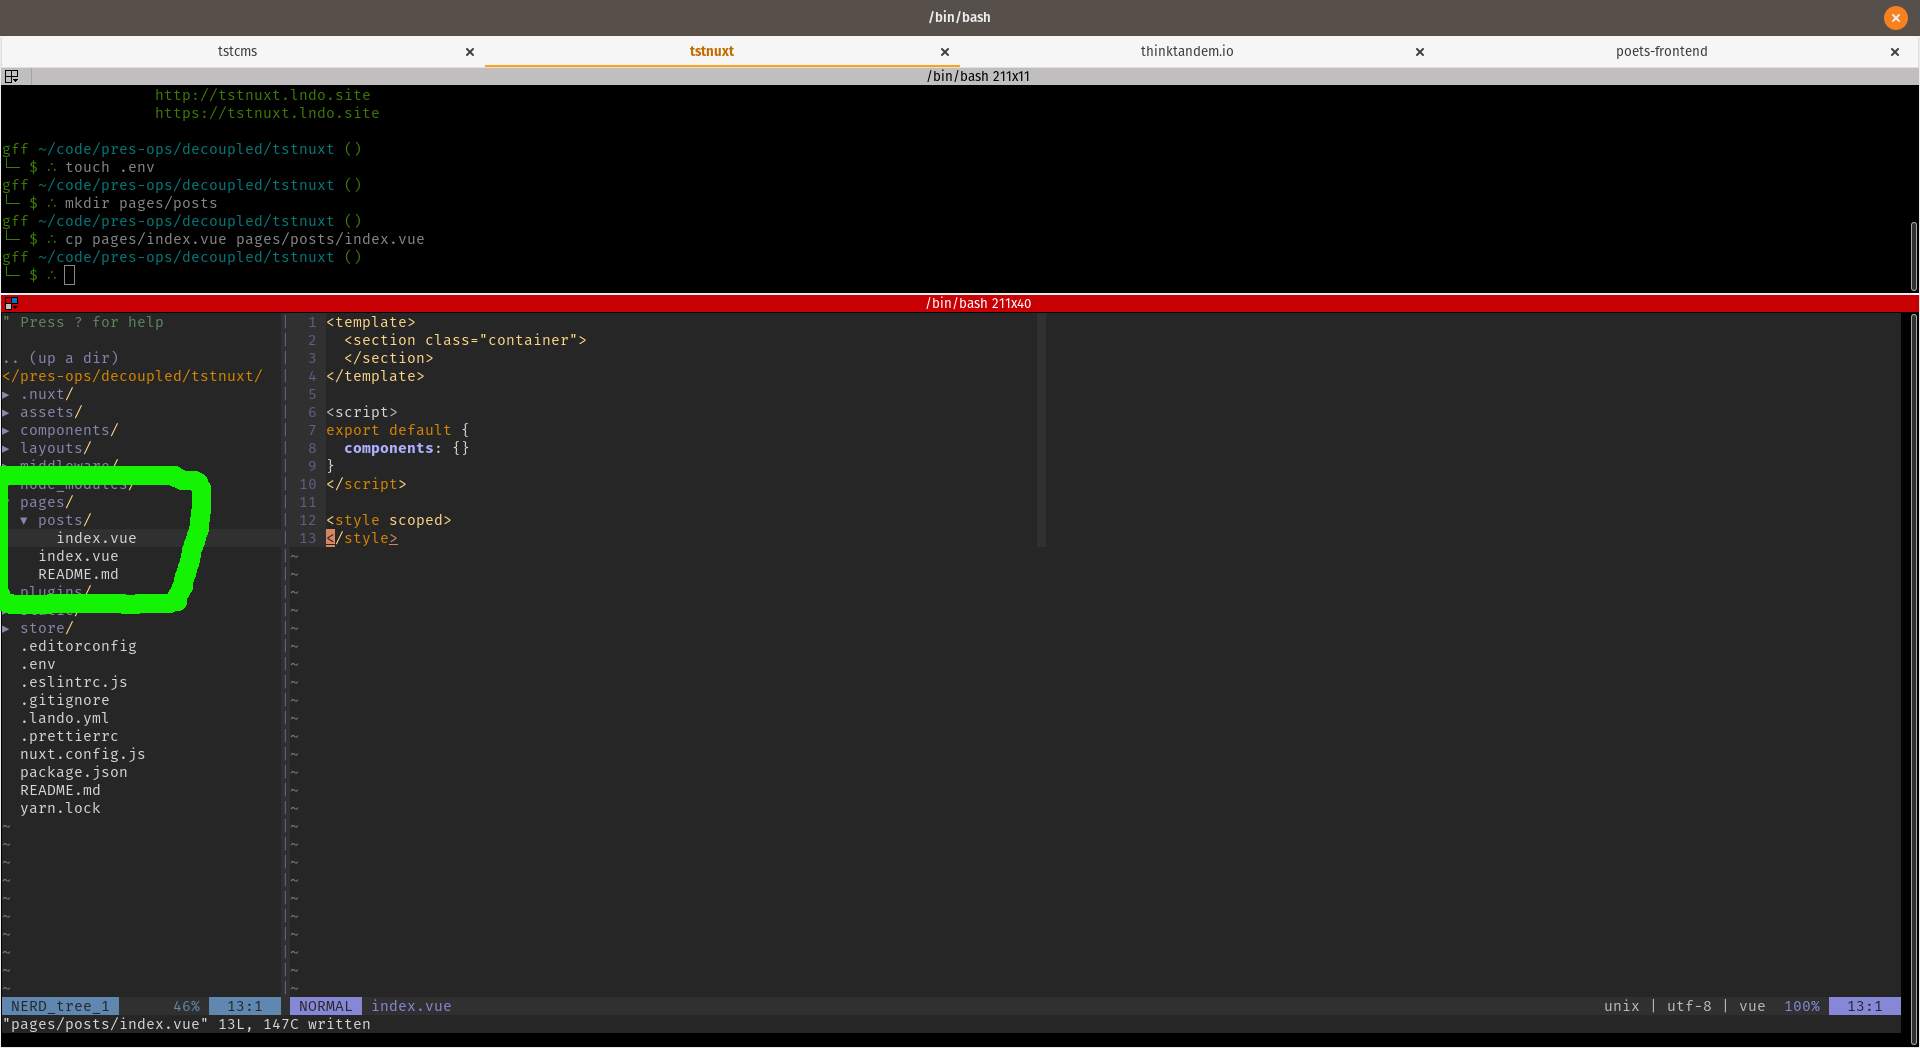
mynuxt app directory structure
Notice the structure of the pages/posts/index.vue file. It has three sections:
<template>, <script>, and <style>. As you can probably guess <template>
section will contain our html, <script> will contain our javascript, and
<style> will contain our css.
Now let's stand up some data for our template. In the <script> section of
pages/posts/index.vue let's add a data() function to let the template know
what data we'll be expecting. In this case our, posts content type consists of
a title and a body field. Open pages/posts/index.vue in your code editor.
In the <scripts> section add in the data() function:
<template>
  <section class="container">
  </section>
</template>

<script>
export default {
  components: {},
  data() {
    return {
      title: "PLACEHOLDER TITLE",
      body: "PLACEHOLDER CONTENT ipsumm dolorem de la sol PLACEHOLDER CONTENT"
    }
  }
}
</script>

<style scoped>
</style>
Now our <template> section has access to this placeholder data() and we can
start building our template. Add to your template section references to the
title and body placeholder data:
  1 <template>
  2   <b-container>
  3     <b-row>
  4       <b-col xl="12">
  5         <h1>{{ title }}</h1>
  6       </b-col>
  7     </b-row>
  8     <b-row>
  9       <b-col>
 10         <div
 11           class="posts__body"
 12           v-html="body"
 13         />
 14       </b-col>
 15     </b-row>
 16   </b-container>
 17 </template>
 18
 19 <script>
 20 export default {
 21   components: {},
 22   data() {
 23     return {
 24       title: 'PLACEHOLDER TITLE',
 25       body: 'PLACEHOLDER CONTENT ipsumm dolorem de la sol PLACEHOLDER CONTENT'
 26     }
 27   }
 28 }
 29 </script>
 30
 31 <style scoped>
 32 </style>
On line 5 we have referenced the title key of our data() function and
rendered the default placeholder content in our template. Similarly, on line 12
we've referenced the body property this time in a v-html vue directive. We've
used v-html to demonstrate passing through data that may contain html. We could
have referenced it the same way we referenced title.
Now visit your page at https://mynuxt.lndo.site and you should see something
like this:
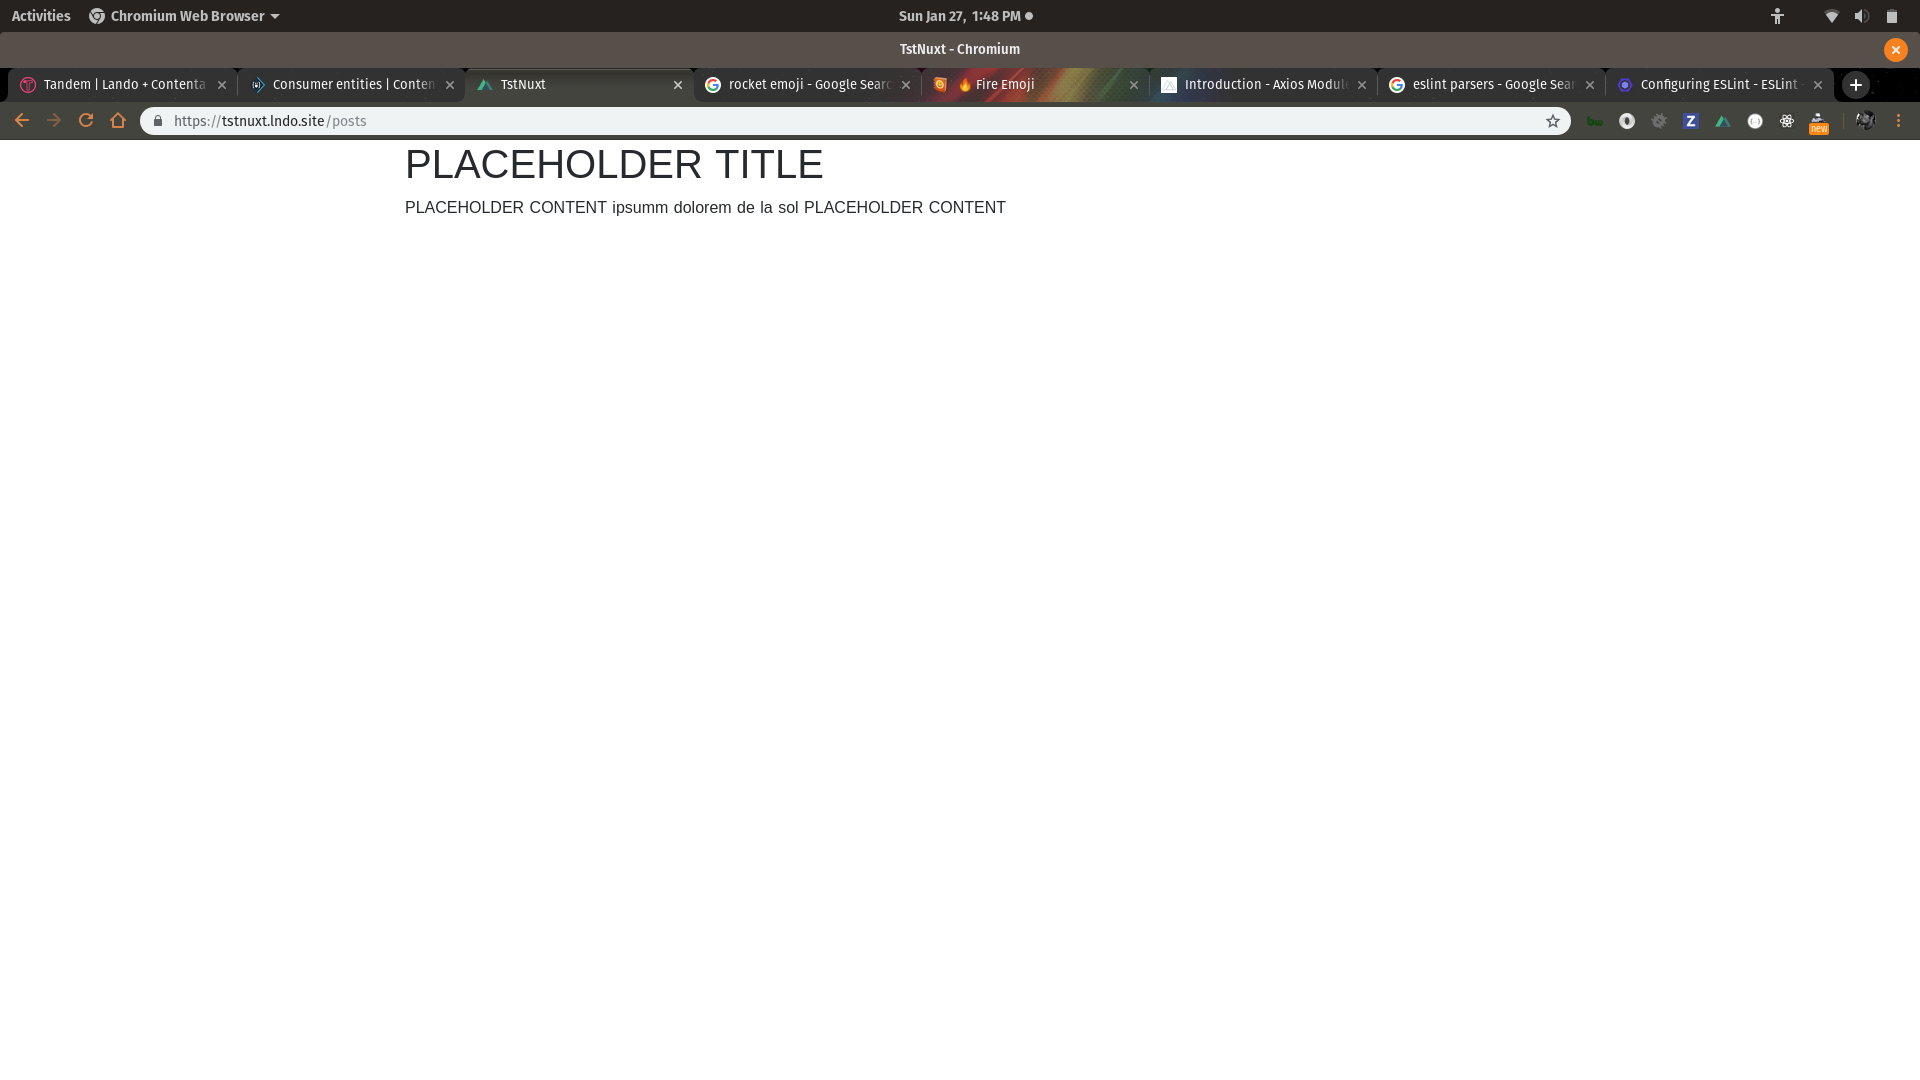
Screeenshot of nuxt app with placeholder data
Now let's replace the placeholder data with real data from myapi.
Inside the <script> section we'll add a new function called asyncData which
will call back to our myapi app with axios calls and get the data and swap out
the placeholder data with real data!
  1 <template>
  2   <b-container>
  3     <b-row>
  4       <b-col xl="12">
  5         <h1>{{ title }}</h1>
  6       </b-col>
  7     </b-row>
  8     <b-row>
  9       <b-col>
 10         <div
 11           class="posts__body"
 12           v-html="body"
 13         />
 14       </b-col>
 15     </b-row>
 16   </b-container>
 17 </template>
 18
 19 <script>
 20 export default {
 21   components: {},
 22   async asyncData({ app }) {
 23     const data = await app.$axios
 24       .get('/api/node/post/698c9621-e676-475f-bb00-63d946bc3fd9', {})
 25       .then(res => {
 26         console.log(res)
 27         return {
 28           title: res.data.data.attributes.title,
 29           body: res.data.data.attributes.body.value
 30         }
 31       })
 32       .catch(err => {
 33         if (err) {
 34           return err
 35         }
 36       })
 37
 38     return data
 39   }
 40 }
 41 </script>
 42
 43 <style scoped>
 44 </style>
Here on line 22 we've swapped out the data() function with asyncData().
The asyncData function is passed in the app context which has acess to the
$axios object via the work we did in .env and nuxt.config.js files. We
use this $axios object to make a GET request back to myapi and get the post
node with uuid=698c9621-e676-475f-bb00-63d946bc3fd9 in this example that uuid
is hardcoded for a specific post.
Now visiting: https://mynuxt.lndo.site we see real data fetched from Contenta:
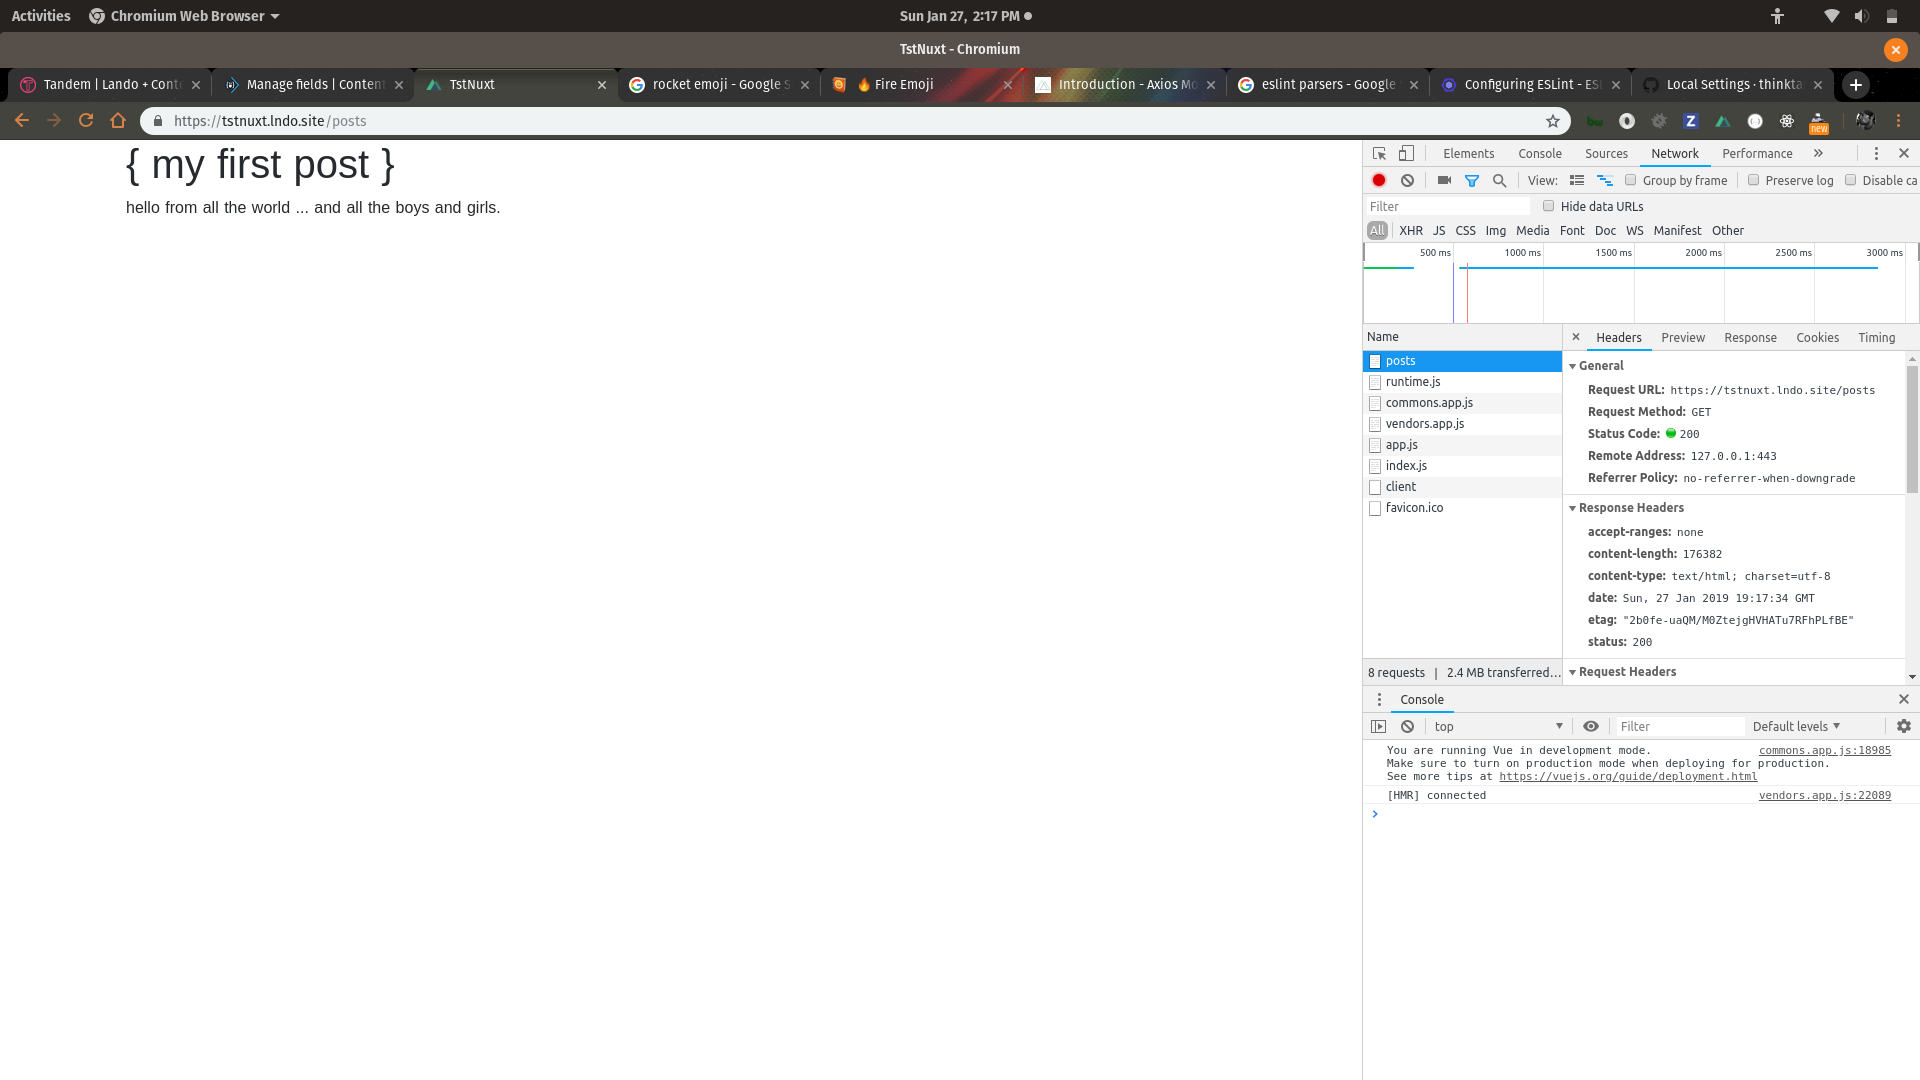
Screeenshot of nuxt app with placeholder data
# Pro Tip
While developing in my *.vue files I like to have a terminal pane open running
lando logs -s appserver -f which tells me when changes are rebuilt via the nuxt
webpack process. It also reports out errors caught by eslint and any console.log
output you put in for debugging.

Screeenshot of terminal top right pane with lando log
In the top right pane is the output of lando logs -s appserver -f.
# Conclusion
In Part 1
we set up the infrastrucutre for our headless apps and here we've configured the
apps for REST communication and shown an example GET request to get data from a
post content. I encourage you to read the Nuxt, Contenta, and axios docs to
drill deeper into the possibilities.
Looking for more help getting your Lando setup? Subscribe to our YouTube channel for instructional videos, and/or find us on slack or read the Lando docs.
